I love to collect and play with paper, especially making 3D items. I also love to collect fabric! I think I have a problem!!!

Tuesday, October 30, 2012

CLARA'S CHRISTMAS EVE KIT

 
MERRY CHRISTMAS TO ALL SVGCUTS FANS!
Look at the new kit!
Yes, it is Christmas time for us!  Yay!!
Look at this gorgeous NUTCRACKER!
YES, he is made out of paper!  I promise!
BALLET SHOES are so adorable!  So many possibilities!
And look at those two cards!  How cute are they!
And, as always, Mary designs the perfect layout!
We can always use a new layout, am I right!
Well, of course I am!
This set is just to die for!  Just superb in every way!

Thursday, October 25, 2012

SPOOKY CUTIES HALLOWEEN TRAIN

As you can see, the Spooky Cuties Devil has turned on the cuties
and captured them!  Along the way, he and his spider brigade are
rounding up his arch enemy, the skeletons!
Oh, my, what will the cuties do?  Hanging on for dear life
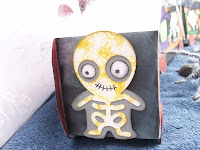
to the front of the train is the spooky cutie skeleton hiding!
Can he be the hero and save all his friends before the Devil
reaches his destiny and destroys them? 


What will become of the cuties!
 
I used the SPOOKY CUTIES KIT & SANTAS TRAIN KIT
 
Thanks for dropping by!
And make sure you drop by
I entered my train and you can enter, you guessed it,
any thing but a card!  How cool is that!
Drop by and check out the sponsor and take a look at
the design team projects!  Awesome!  And look at the
wonderful entries!  Great ideas shared!
Have a spooktacular halloween!!
Hugs, Debra


Wednesday, October 24, 2012

CHRISTMAS ORNAMENTS KIT


CHRISTMAS ORNAMENT KIT
You'll be rockin' around the Christmas tree as you decorate
with these beautiful handmade ornaments designed by Mary.
 
Two intricate snowflake ornaments are perfect for the tree!
And can also be used to embellish a gift bag or box!
The partridge in the birdcage is adorable!  Come spring,
look at all the possibilities of other creations!
The tree is just the cutest!  It also has an extra file
if you want to turn it into a box to hold treats!
And last, but surely not least, the spindle ornament!
A twist on the vintage ornaments from the past. This
detailed and complicated looking ornament is wonderful,
but guess what, it goes together pretty quick and is
so easy to make!  You have to try these!  They are just
what you need, if nothing else, for your holiday crafting.
Have fun and .............take some time to rock!
 

Rocking around the Christmas Tree at the Christmas party hop
Mistletoe hung where you can see Ev'ry couple tries to stop

Rocking around the Christmas Tree Let the Christmas Spirit ring
Later we'll have some pumpkin pie and we'll do some caroling

You will get a sentimental feeling When you hear voices singing
"Let's be jolly; Deck the halls with boughs of holly"
 
Rocking around the Christmas Tree Have a happy holiday
Everyone's dancing merrily In a new old fashioned way

Rocking around the Christmas Tree Let the Christmas Spirit ring
Later we'll have some pumpkin pie and we'll do some caroling

You will get a sentimental feeling When you hear voices singing
"Let's be jolly; Deck the halls with boughs of holly"

Rocking around the Christmas Tree Have a happy holiday
Everyone's dancing merrily In a new old fashioned way


Wednesday, October 17, 2012

HAPPY THANKS KIT

 
GIVE THANKS WITH HAPPY THANKS
 
Get in the Thanksgiving holiday spirit with this wonderful new kit
creating these cute projects to give as gifts or decorate your table or home!
The CORNUCOPIA is 6" long!  Make a CARD for a loved one.   Check out that
PILGRIM HAT, it's a box!  And Isn't the TURKEY the cutest!  Fill with candy!
And last, the HOUSE is a place card holder which holds an electronic LED
tealight.  So cute.  Check it out:   http://www.svgcuts.com/
  Be creative as  Brigit did at Brigits Scraps.  She turned it into
a Christmas ornament!  Check it out here: 

Thanksgiving Magic

by Rowena Bastin Bennett

Thanksgiving Day I like to see
Our cook perform her witchery.
She turns a pumpkin into pie
As easily as you or I
Can wave a hand or wink an eye.
She takes leftover bread and muffin
And changes them to turkey stuffin’.
She changes cranberries to sauce
And meats to stews and stews to broths;
And when she mixes gingerbread
It turns into a man instead
With frosting collar ’round his throat
And raisin buttons down his coat.
Oh, some like magic made by wands,
And some read magic out of books,
And some like fairy spells and charms
But I like magic made by cooks!


Tuesday, October 9, 2012

DOOR SKELETON

DEAD ZONE SKELETON
Enter if you dare!
Does anybody remember those skeletons that would move at their joints?
Well, I do!  And I loved them when I was a kid!
I used the skeleton body from SPOOKY SILHOUETTES COLLECTION
and a pumkin for the head from MIDNIGHT JAMBOREE KIT
from http://svgcuts.com/ to make
my version of a jointed skeleton!
He's 36" tall x 24" wide posed this way!  He is posable and has
a permanent home, for now, on my front door!
Here's a closeup of his face and a few bones!
 
When I broke apart the skeleton in ECAL program, I made sure
I stacked all the pieces on top of each other, keeping my eye
on the largest piece.  As I enlarged, I made sure the largest
piece fit into the boundary of the cutting mat, leaving room
knowing I will be making another larger layer of the bones,
plus a shadow piece. 
I used Tim Holtz inks for all my inking.
The Dead Zone sign is actually a styrofoam sign from the
Dollar Store and was grey in color.  I used my Tim Holtz inks,
 Salty Ocean Blue, Festive Berries Red and white, to get the look
I wanted. I was surprised how well the styrofoam took to the ink.
Mr. Skeleton has been entered in Challenge #3 over at
They have a wonderful bunch on their design team!
And give us all a chance to win fantastic prizes!
Three's a charm, they say,
Unity Stamp Co. http://tinyurl.com/9dl6awq,
is sponsoring this time around!  Awesome!


Sunday, October 7, 2012

ADVENT CALENDAR TREES KIT

Oh Christmas Tree, Oh Christmas Tree,
Much pleasure thou can'st give me!
And to you and your family!
What a beautiful kit Mary created!

Look at all the wonderful things you can do with these
amazing trees!  What fun you can have with your family!
Fill with candy or small gifts for all to enjoy!
Or maybe create a whole different theme!
Hmmmm, thinking here!  What can I make!!
Drop back by, you just never know!!

Speaking of creating from a Christmas kit for a different theme,  here's a
HALLOWEEN STAR
 I made using the 3D Star from Spirits of Christmas Past!

 
Thanks for dropping by!


Wednesday, October 3, 2012

"Ghostess with the Mostess" design challenge!

TRICK OR TREAT
I love this ghost!!!
is having a
Fa-BOO-Lous Halloween Inspiration week!
Ghostess with the Mostess design challenge!
I was inspired to turned the svg into a plush ghost!  It's 19"tall and 14"wide
 
One of the sponsors helping out is Michelle from
  http://www.designsoncloud9.com/
who graciously donated the really cute freebie ghost svg! 
I enlarged the main body part full size to fit in my 12 x 12 mat and
the other pieces to match. I then used those pieces as a pattern and laid down
on double layers of plush white felt.   (You need two pieces of each pattern).   
Put a few pins to hold down the pattern, sew around the edge, leaving a small
opening for turning, then cut all around the edges leaving 1/8 inch.  Plush felt
will turn easy, so I did not have to clip any seams on the curves, but if you
make this and use a different type of material such as muslin, you will want to
leave a 1/4 inch seam allowance when you trim and you will have to clip
into the seams around the curves to get a nice clean edge.  Use fiberfil
to stuff and sew the opening closed.  I hot glued everything together, makes it
very sturdy.  You can sew it together, if you prefer.  Make sure you decorate the
head however you want before you stuff and close up.
I hand blanket stitched my eyes on.  The cheeks are made out of Homespun
fabric.  I used a disappearing ink marker and drew around the pattern circle
onto a square piece of Homespun.  I then stitched on top of that line. Use
a small stitch.  It's okay if it puffs up the fabric in the middle. You want that.
Cut any excess fabric down to about 1 inch all around the circle, then start
pulling the threads to fray.  Pull till you reach your stitched circle.  Eventually,
you will have four corners weaved together, just use a needle or pin to break these
apart and spread out.  Once you have every thread frayed, trim all around to 1/2"
from the circle.  Easy peasy!!!  Now it's going to be puffy in the middle from
sewing, that's what you want!  Attach to cheek with a running stitch on top of
sewing stitch.  Just before you get to end, stuff lightly!  And, there you
have it!  Puffy cheeks!  Who doesn't love puffy cheeks!!
Add your embellishments, a mouth, whatever you want!  My mouth is
actually a button covered with black velvet!  Yes, they still have covered
buttons!!!  Okay, I may be showing my age with my supplies on hand!!
The candy is made of paper, of course!  Those are wiggly eyes on the
yellow candy!!  And the ticket "Treats" is an svg from Party on Elm Street Kit
from, you guessed it, http://svgcuts.com/
Thanks for floating in!  Have a Boo-tee-ful Day!!!
 
SPOOKY CUTIES SKELETON STUFFED BABY
A stuffed baby for my daughter!  Even though she's 21,
she still loves her stuffed babies!


Tuesday, October 2, 2012

Witch Hat from Gimme A Candy Box Kit!

 
I love this kit!  Quick and easy!
Here's my version of the Witch Hat Box
From Gimme A Candy Box Kit!
 
 
The spider paper and the circle is digital paper
called  "Haunted Full Collection"
by Carina Gardner from Jessica Sprague's site. Click below!
 
After I glued the two pieces for the brim of the hat using just
plain black cardstock, I spritzed water to moisten the fibers then
scratched the surface edges to rough it up and make it curl.  Once
it dried, I inked with brown and black inks giving an aged look.
The picture really doesn't show well, but it looks pretty cool!
The witch is in the Haunted Paper Collection.  I just printed it out,
used a paper punch, and backed it with a rosette.  Looks kind of
like a bottle cap, don't ya think!!
Well, thanks for dropping in, now be a good witch and fly away!!!